[JDSS] [DSS V7] How to connect to a iSCSI target with MPIO using Microsoft iSCSI initiator?
Additional information:
- product name: JovianDSS / DSS V7
- product version: all / version
- build: all / version
Subject:
In this article we connect to a iSCSI target with MPIO using the Microsoft iSCSI initiator.
Contents:
Preparing the Hardware environment.
Both system, the client and the server should have the same amount of NICs.
On the server set two networks. For example we use 192.168.144.1 and 192.168.145.1.
On the client set two networks. 192.168.144.2 and 192.168.145.2.
Adding the MPIO functionality on Windows Server 2019.
We head to the server manager and click onto add features and roles.
We go to features and look for Multipath I/O.
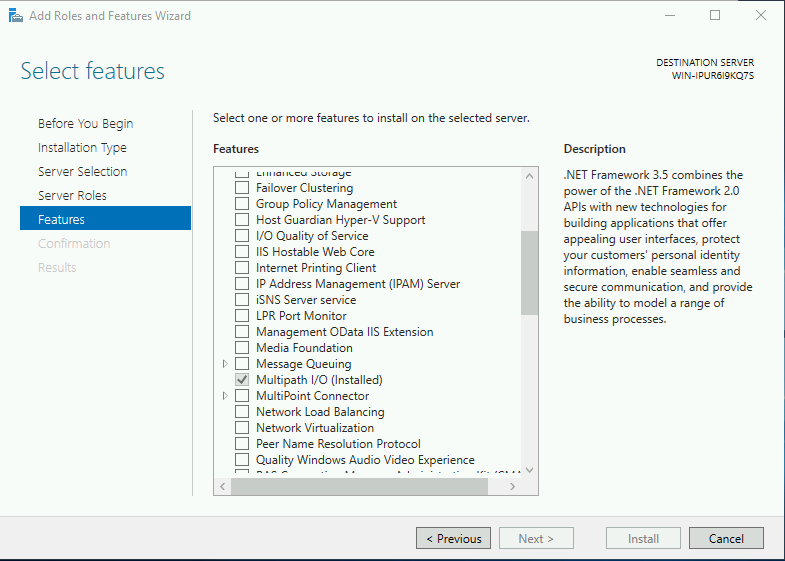
Select it, click on install and after the installation reboot the system.
Enabling MPIO using the Administrative Tools.
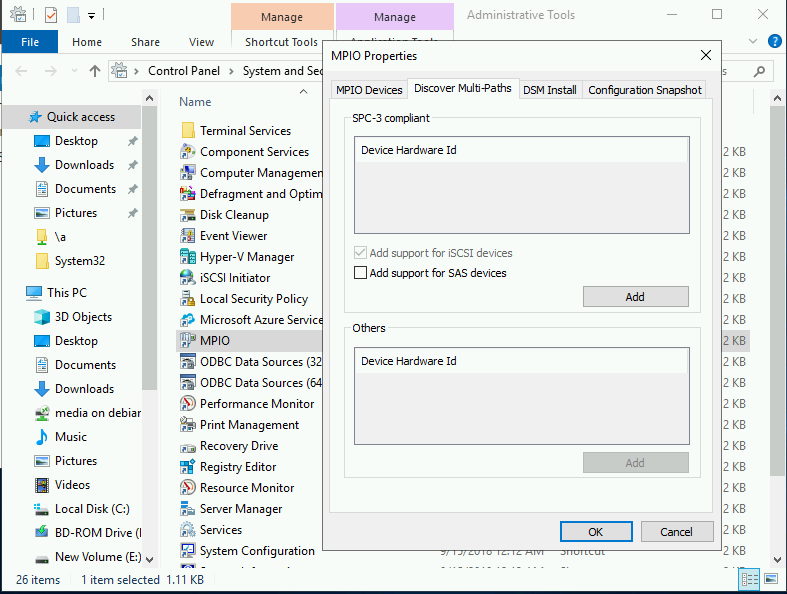
We go to Administrative Tools and double click on MPIO.
Click on the Discover Multi-Paths tab, and check the "Add support for iSCSI devices" box and reboot the system.
Connecting to a target using MPIO.
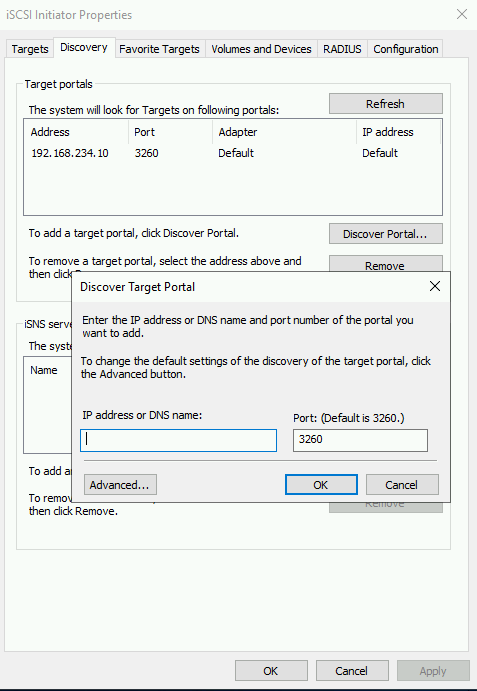
Open Microsoft iSCSI Initiator and click on the Discovery tab.
Click on "Discover Portal" and enter the servers IP (in this case its 192.168.234.10) and click ok.
Afterward go to the Targets tab, select the target, click on connect.
Check "Enable multi-path" and go to Advanced.
Change the Local adapter to Microsoft iSCSI Initiator.
Initiator IP to the first NIC in this case 192.168.144.2.
Target portal IP to the first nic of the server in this case 192.168.144.1
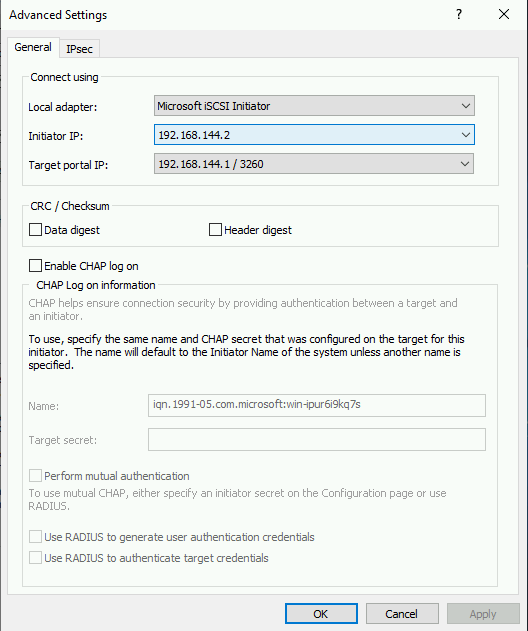
Repeat this step for each path You want to use. Remember to add for each path a different pair of NIC's.
In this case it would be Initiator IP 192.168.145.2 and Target portal IP 192.168.145.1.
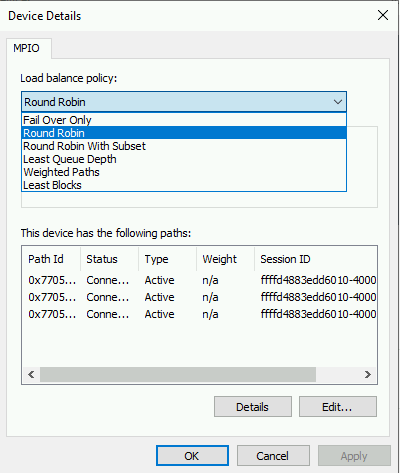
Afterwards You can select the mode in wich MPIO should work.
From the targets tab select Your target, click on devices and proceed to advanced and click on MPIO.
