|
|
|
|
Article ID: 59
Last updated: 18 Sep, 2008
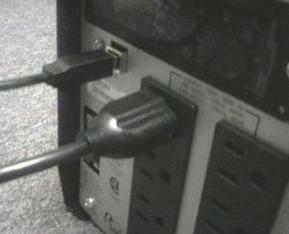
Hardware and GUI setup for the APC 750XL UPS Hardware setup1. Connect your UPS to the power source.
The UPS comes with two cables: one USB, and one serial cable. You can use either of these to connect the UPS to your server; both are compatible with Open-E. Your UPS server is the machine that will manage the shutdown process.
.png) Serial Cable
2. If you’re using a serial cable, connect it to the back of the UPS, as shown.
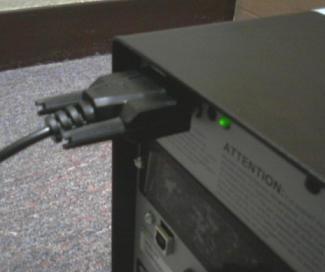 3. Now connect the other end of the serial cable to the serial port on your server.
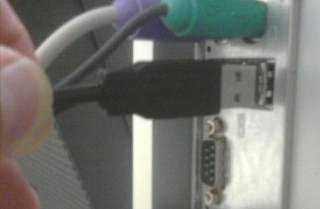
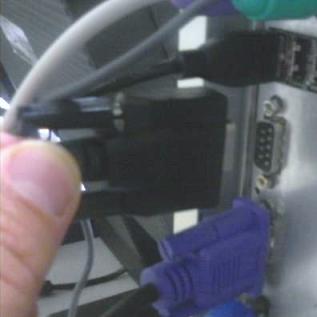 4. For a usb connection, connect the square usb end of the cable to the UPS as shown.
 5. Now connect the slotted end of the usb cable to a USB port on the server.
 GUI Setup 6. Go to SETUP -> hardware -> Function: UPS settings. Check the ‘Use UPS’ box.
Click the radio button at Set UPS vendor: APC. 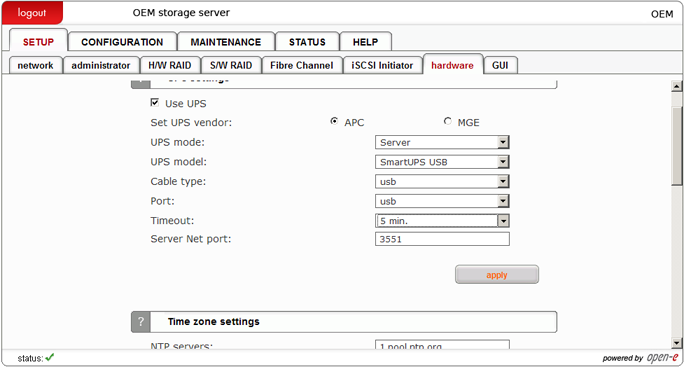 7. Set UPS Mode to “Server”. Note: If you’re setting up only one machine on the UPS, set the UPS mode
to ‘Single’. All the subsequent steps below will be the same. 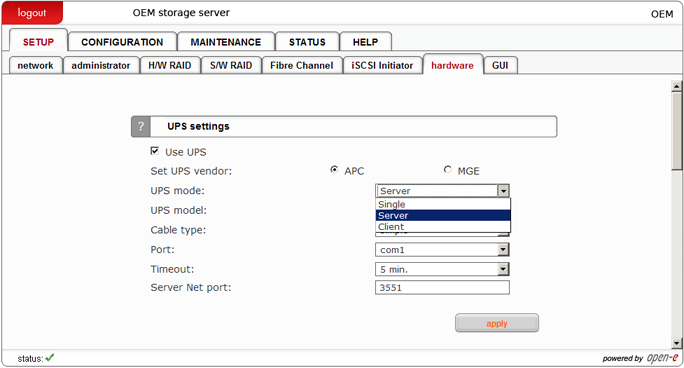 8. Set UPS Model: to ‘Smart UPS’ for a serial connection. 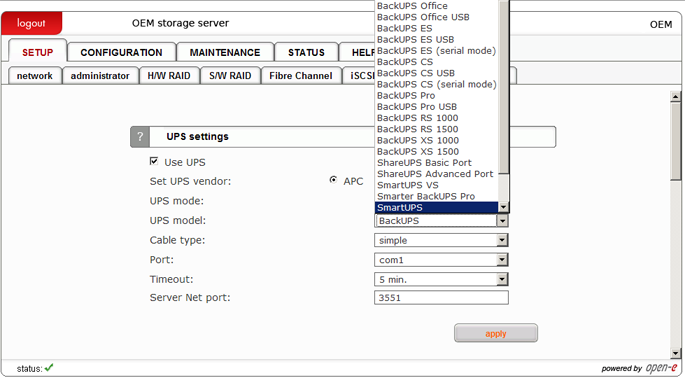 Set cable type to ‘smart’. Set your port to the correct com port (the default is com1). 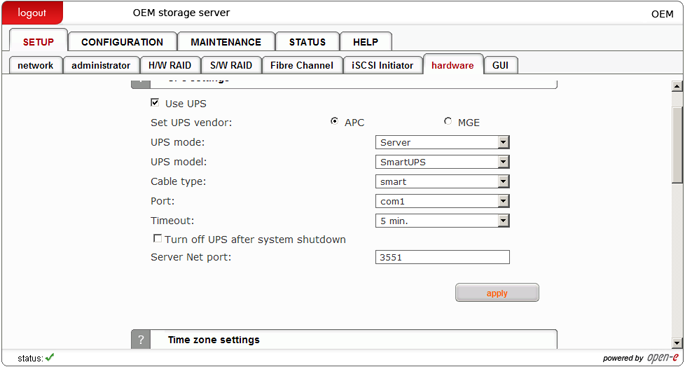 If you’re using a USB cable, set the model to ‘SmartUPS USB’. For USB, the cable type and port fields will populate automatically.
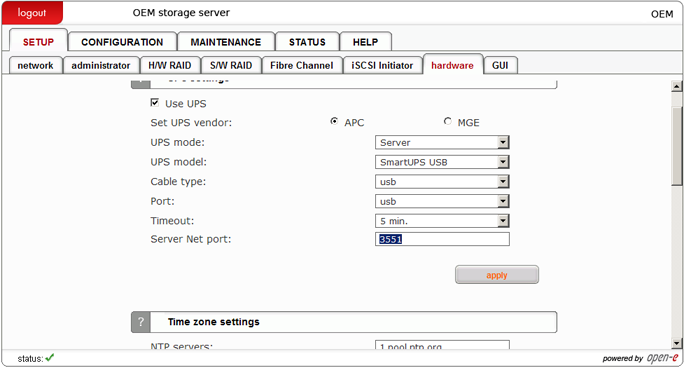
.png) 9. Select your timeout setting. This is the interval of time between power failure and server shutdown. 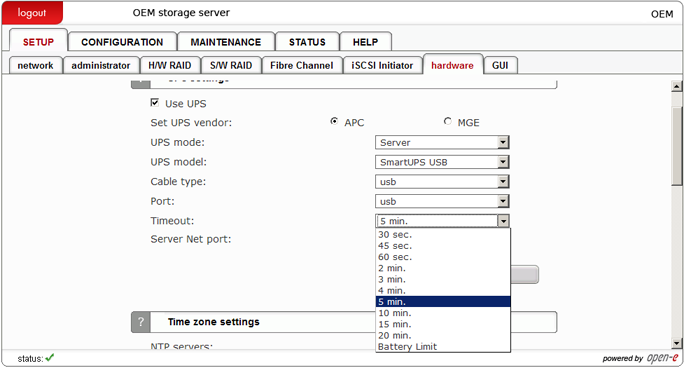 10. Enter the Server Net port: 3551 11. Click ‘Apply’ to save changes
 12. Go to Status -> Hardware -> Function: UPS status
UPS Mode: Should be ‘Net Master’
Status: Should be ‘ONLINE’ 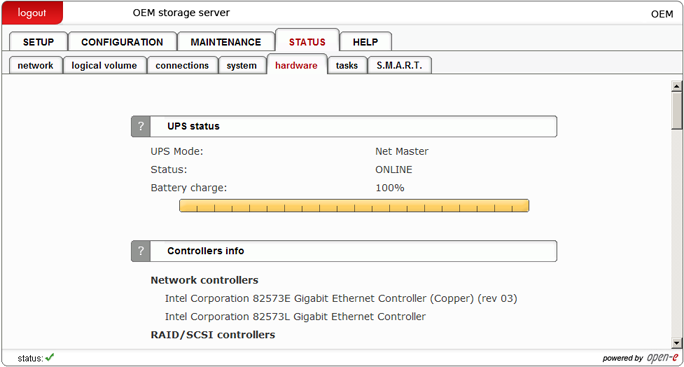 On the Servers working as APC clients, there are only three steps to the setup in the GUI: The UPS mode, the
UPS Server IP address, and the Server Net port. (Be sure to set ‘Use UPS’ and ‘APC’). If you’re using a single connection, skip to Step 16 below. 13. Set UPS Mode to “Client”
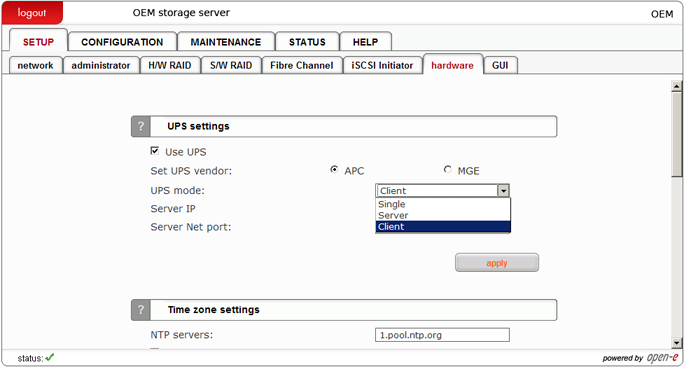 14. Set the Server IP address in the field provided (this is the Server IP, not the client).
Enter the Server Net port: 3551. 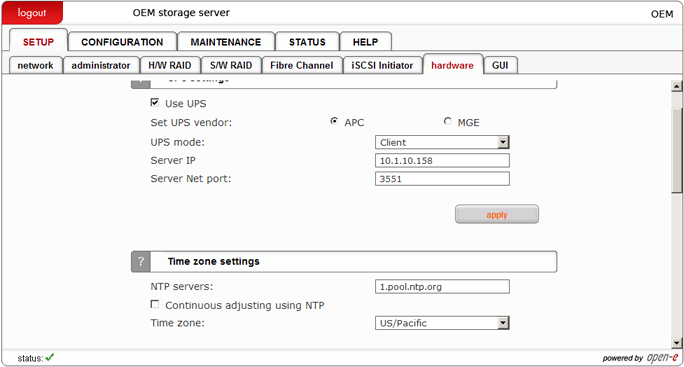 15. Click ‘Apply’ to save changes
16. Go to Status -> Hardware -> Function: UPS status on both the server and the client, (or the machine
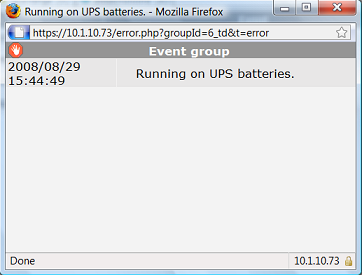
set up as a Single). UPS Mode: Should be ‘Net Master’. Status: Should be ‘ONLINE’ . .png) 17. In the event of a power failure, you will see the screen below at the STATUS -> hardware tab.
For the purpose of testing, simply disconnect your UPS from power. Your server(s) should automatically shut down after the elapsed time you have selected in Step 7 above. 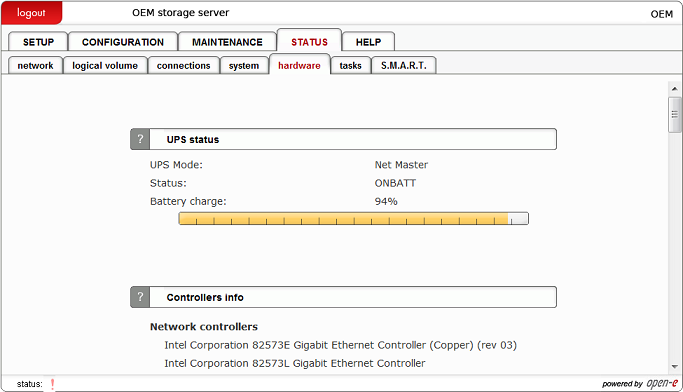 If you wish to confirm the power failure, you can check the error messages by clicking on the ‘!’ in the status line of the GUI. You should see the following messages on failure. Remember, to get these pop-up windows, you must click the error message link.
 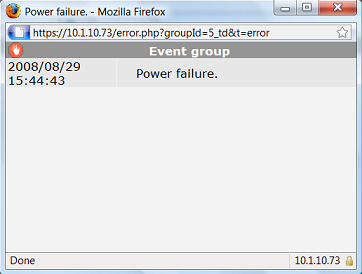 When power is restored, you should get this message in your error log: 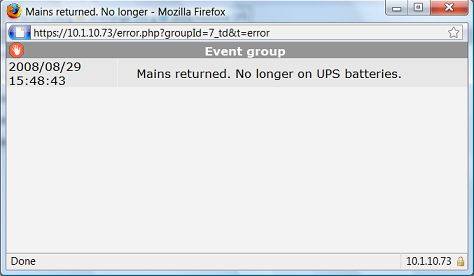
Share this article
Link to article
|

The Knowledge base is managed by Open-E data storage software company.